
| Four Color Printing: System used to separate color images into 4 color values: Cyan, Magenta, Yellow and Black (CMYK), then by using halftone angled screens, these 4 colors can represent most of the original image's colors. Four color printing, also called full color printing, can be achieved by traditional offset printing, or modern digital printing. Offset Printing: Traditional press printing of CMYK images and text. Offset printing is a printing technique in which the inked image is transferred (or "offset") from a plate to a rubber blanket, then to the printing surface. When used in combination with the lithographic process, which is based on the repulsion of oil and water, the offset technique employs a flat (planographic) image carrier. Ink rollers transfer ink to the image areas of the image carrier, while a water roller applies a water-based film to the non-image areas. Most traditional printing presses use this printing process. Compared to other printing methods, offset printing is best suited for economically producing large volumes of high quality prints in a manner that requires little maintenance. Many modern offset presses use computer-to-plate systems as opposed to the older computer-to-film work flows, which further increases their quality. Our products are printed on a variety of offset presses, depending on the size, run length, and intricacy of the print job. We currently utilize a 6 color Ryobi 756XL-E, a 5 color Heidelberg SM-52, and a 4 color Ryobi 3304HA. Digital Printing: Modern press printing of CMYK images and text. It usually refers to professional printing where small-run jobs from prepress are printed usinghigh-volume laser printers. Digital printing has a higher cost per page than more traditional offset printing methods, but this price is usually balanced by avoiding the cost of all the technical steps required to make printing plates. It also allows for on-demand printing, short turnaround time, and even a modification of the image (variable data) used for each impression. The savings in labor and the ever-increasing capability of digital presses means that digital printing is reaching the point where it can match or supersede offset printing technology's ability to produce larger print runs of several thousand sheets at a low price. We currently utilize an iGen4 XLE, Ricoh Pro C5100S, and Ricoh Pro 8120E. |
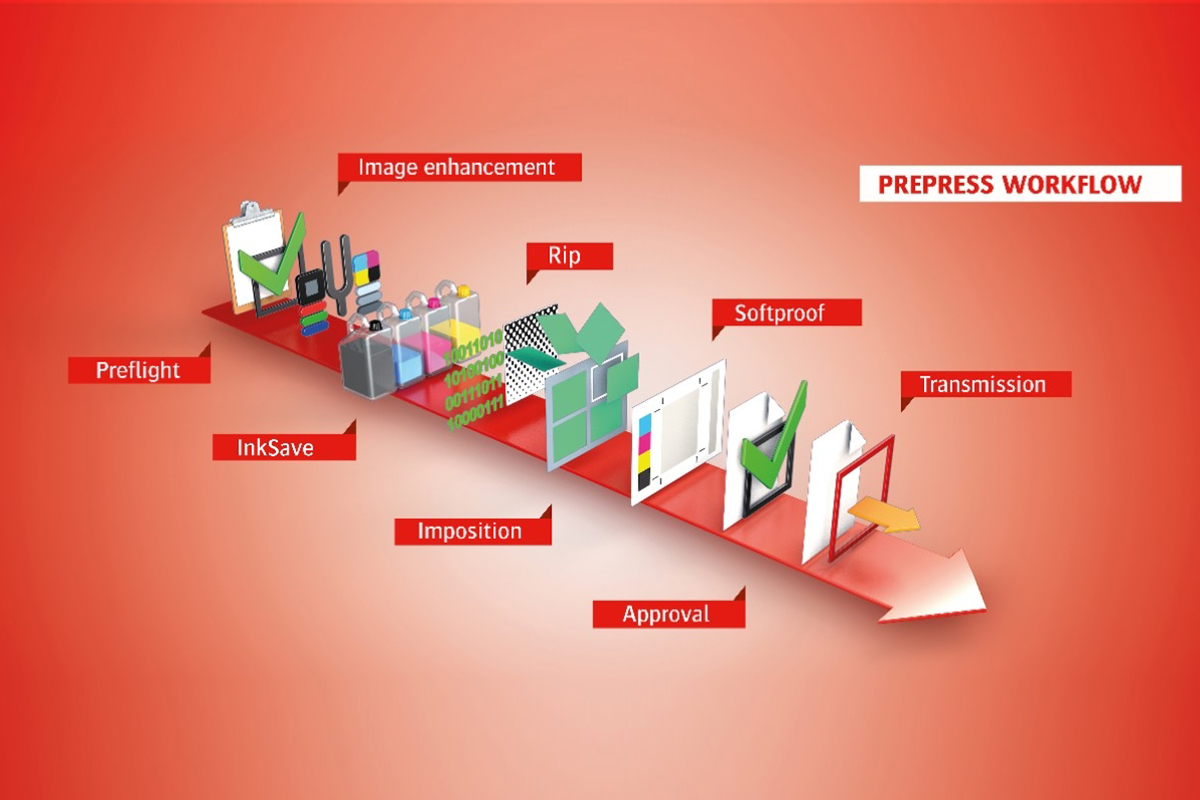 | Prepress: Prepress is the term used in the printing and publishing industries for the processes and procedures that occur between the creation of a print layout and the final printing. The prepress procedure includes the manufacture of a printing plate, image carrier or form, ready for mounting on a printing press, as well as the adjustment of images and texts or the creation of a high-quality print file. In today's prepress shop, the form of delivery from the customer is usually electronic, either a PDF or application files created from such programs as Adobe InDesign, Adobe Illustrator, or QuarkXPress. Prepress Processes: - Typesetting involves the presentation of textual material in graphic form on paper or some other medium. Before the advent of desktop publishing, typesetting of printed material was produced in print shops by compositors or typesetters working by hand, and later with machines.
- Copy-editing, is the work that an editor does to improve the formatting, style, and accuracy of a manuscript. Copy-editing is done prior to the work of proofreaders, who handle documents before final publication.
- Markup is an artificial language using a set of annotations to text that give instructions regarding the structure of text or how it is to be displayed. Markup languages have been in use for centuries, and in recent years have also been used in computer typesetting and word-processing systems.
- Proofing involves creating an accurate facsimile of the artwork before beginning production runs. This serves as a bond between the printer and their customer that the final product meets an agreed upon standard. Proofs in general can be done for all parts (images, illustrations, texts and colors) of print product. In this part, three types of proofing should be checked and printed out: the print-ready PDF files, the printer's proof and the imposition proof. Print-ready PDF files should be made after the layout using preflight at the printing house. The printer's proof should be printed out in high-resolution and checked by the customer. The imposition proof, which is usually done by the printers, should also be printed out to check and adjust the printing press.
- Proofreading traditionally means reading a proof copy of a text in order to detect and correct any errors. Modern proofreading often requires reading copy at earlier stages as well.
- Screening and adjustment of a continuous tone of images such as photographs.
- Imposition, or the combination of many pages into a single signature form.
- Separation, or specifying images or text to be put on plates applying individual printing media (inks, varnishes, etc.) to a common print.
- Computer to plate (CTP), or the transfer of the image to the printing plate. A platesetter, or CTP device, uses a laser to burn the image from a computer file onto a printing plate. Plates are made of different materials, depending on the needs of the printing method. Usually rubber, plastic and aluminum are used for plates.
- Manufacturing of a high-quality print (PDF) file, which is used for the final printing.
- Planning, Paper select, choosing a proper paper is also a very important step in prepress.
File Preparation: When making your print PDF make sure to: - Embed all the fonts.
- Export with bleeds.
- All images should be CMYK and at least 300dpi (150dpi might seem to print ok but not recommended for high end printing).
- Compression is important, for optimal results make sure that the images are compressed without downsampling OR downsampled to at least 300dpi (ZIP compression or maximum quality JPG).
File Preparation Terms:
Bleed: Does your artwork contain images, text or graphics that extend the the very edge of the finished piece? This is called "bleeding off the edge" or simply "bleed". Files with bleed need to be built to the final trim size plus 1/8" extra on each side for the bleed. Example, if you are ordering an 8.5" x 11" sell sheet, the graphic file's size should 8.75" x 11.25". When saving the file into the proper format (preferably PDF), do not use any crop or printer's marks. These will increase the dimensions of the file.
Borders: Does you piece contain a graphic or artistic border close to the paper edge? See related Bleed above and Safety Zone below. When paper is trimmed there is a cutting tolerance of 1/16" which may result in uneven borders. For this reason we do not recommend borders. However, if they are necessary in your piece, the border should be at least 1/4" thick and at least 3/8" from the bleed line. Perfect trimming is not guaranteed.
Color Mode: Does your piece contain more than black color? Files that contain color text, artwork, or images must be saved in four color "CMYK" (Cyan, Magenta, Yellow, Black) color mode. Files submitted in the RGB or Pantone color mode will need to be converted to CMYK. Note that converting RGB to CMYK will cause a color shift as they are not the same color spectrum.
If your four color (CMYK) order is supplied in spot colors, our software will convert the spot colors to CMYK using the U.S. Prepress Default (SWOP v.2) conversion.
Is your piece black and white? Files that are black and white must have all artwork or images in Grayscale color mode.
Fonts: Are you using vector-based software such CorelDraw, Adobe Illustrator, Adobe InDesign, or Adobe Freehand? For vector files such as these all text must be converted to outlines before creating the file (preferably PDF) you send us.
Are you using a bitmap-based (a.k.a. raster) software application such as Adobe Photoshop? For bitmap files such as these, simply flatten the image. Avoid font sizes smaller than 8 pts or fonts that are very narrow as these may not print, or will lack crispness, or may not display well against dark backgrounds.
Image Resolution: While your computer screen will display low resolution images well, when printed they will look rough, blurry and jagged. For best printing results, a resolution of at least 300 dpi is recommend. Files with resolution lower than 300 dpi can be printed, but the results may be unsatisfactory.
Lines: Do you have lines on your piece? All lines should be at least .25 pts thick to make them printable. Thinner lines may display on your screen but be too thin to print.
Safety Zone: Does your piece have any images, text or other elements close to the page edge? If too close, it may get cut off. Establish a no-go "safety zone" of at least 1/8" from the edge of the final trim size. To avoid any images or text being cut off when the piece is trimmed, do not place them in the safety zone.
Size: Does your artwork contain images, text or graphics that extend the the very edge of the finished piece? This is called "bleeding off the edge" or simply "bleed". Files with bleed need to be built to the final trim size plus 1/8" extra on each side for the bleed. Example, if you are ordering an 8.5" x 11" sell sheet, the graphic file's size looks like 8.75" x 11.25". When saving the file into the proper format (preferably PDF) either make sure there is a trim box and bleeds, or the file is larger than the cut piece. |
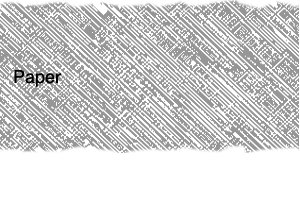
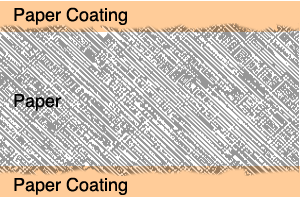
| Uncoated Paper: All paper stocks start out being uncoated. Uncoated paper is porous with an uneven, rougher surface. As a result, uncoated paper is easier to write on as it absorb ink readily and dries to the touch faster. However, the heavier amount of ink uncoated paper absorbs may result in less rub resistance. Uncoated stocks include bonds, offsets, card, and newsprint. Coated Paper: After manufacture, the uncoated paper surface may be coated with white clay materials. The clay gives the paper a smooth feel by filling minute valleys in the paper surface. The coating also limits the absorption of inks into the paper. Because the inks stay on the surface of the coating instead of soaking in, the ink looks deeper, sharper and glossier. However, writing and ballpoint pen inks may take longer to dry on coated paper and can smudge more easily. On coated stock, less ink is need to achieve the desired visual richness for text, images and photo's. |
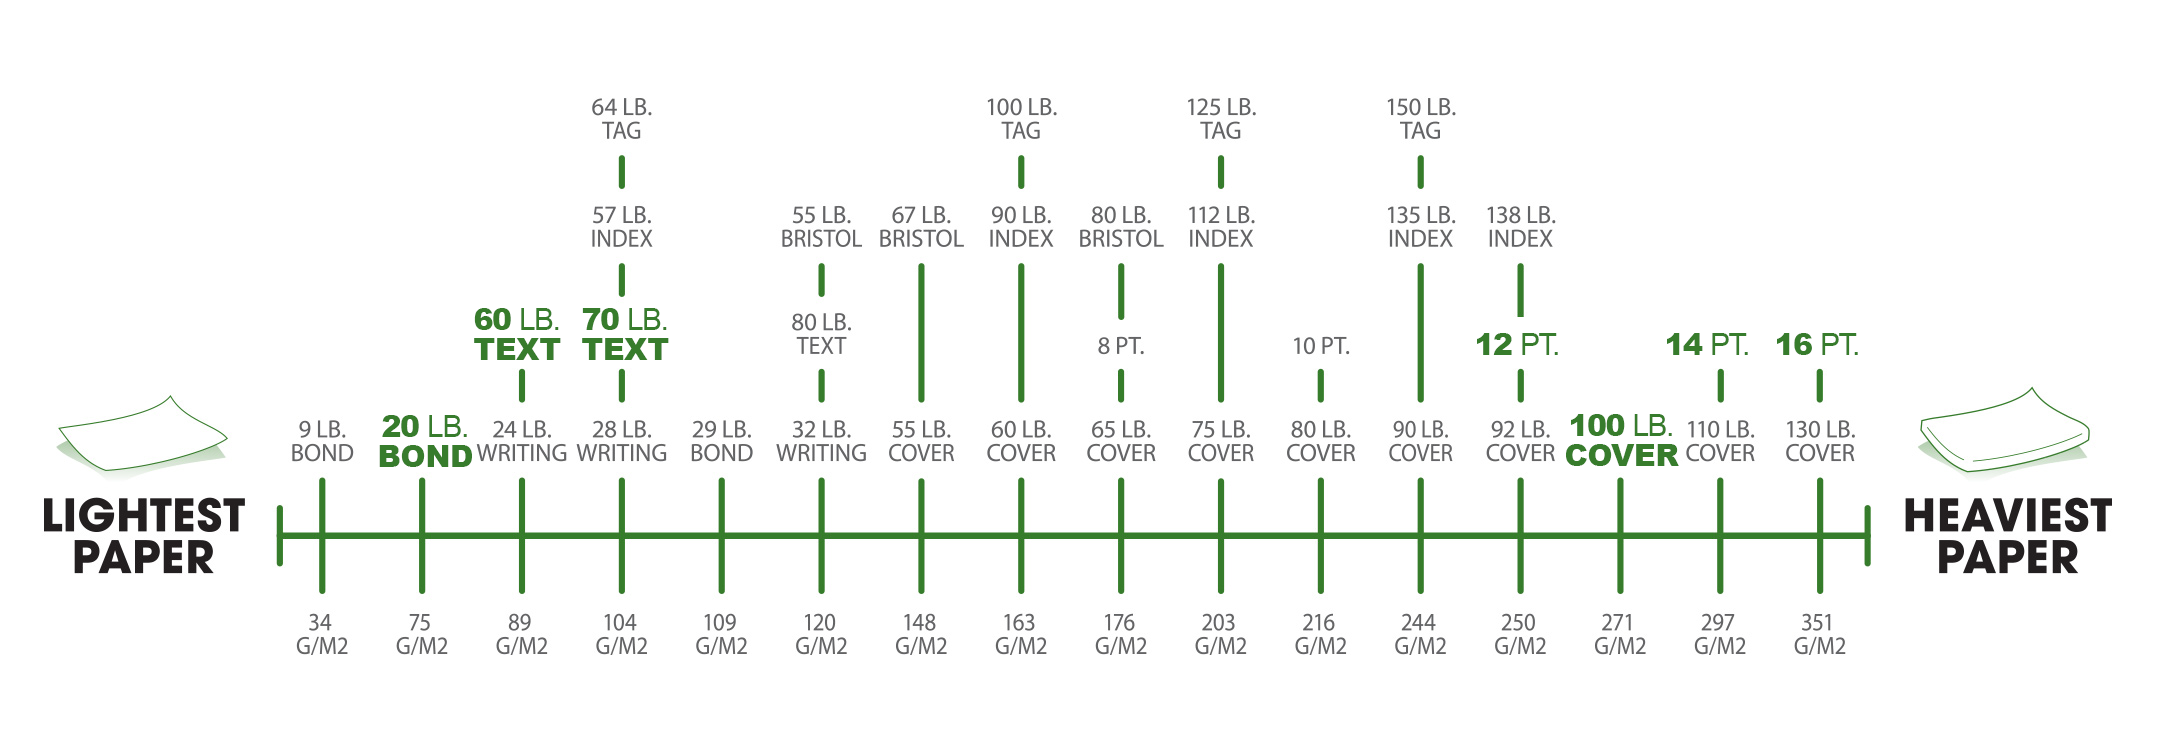 | Text Papers: Thin paper ranging from simple bond to gloss text. Text papers are usually used for pamphlets, brochures, magazines and letterhead. 20lb. Bond: thinnest house uncoated paper
50lb. Husky: thin name brand uncoated paper
60lb. Husky: thin name brand uncoated paper
70lb. Husky: thin name brand uncoated paper
60lb. Offset: thin house uncoated paper
60lb. Classic Crest: name brand uncoated paper
70lb. Classic Crest: name brand uncoated paper
60lb. Classic Laid: name brand uncoated paper
70lb. Classic Laid: name brand uncoated paper
60lb. Classic Linen: name brand uncoated paper
70lb. Classic Linen: name brand uncoated paper
100lb. Gloss Text: thickest text coated glossy paper Cover Papers: Thick paper commonly used for booklet covers and thin postcards. 100lb. Gloss Cover: thick coated glossy paper
100lb. Cougar Cover: thick name brand uncoated paper Board Papers: Thickest paper commonly used for business cards, postcards and thick booklet covers. 12pt. C1S: coated gloss paper on 1 side (Inside is uncoated)
14pt. C2S: coated gloss paper on 2 sides (thick)
16pt. C2S: coated gloss paper on 2 sides (thicker) |